Now you have a lot of badges, because you love them. Err, I mean because THE CHILDREN LOVE THEM. And as you go through the house you find abandoned badges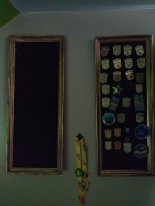 and realize that they are going to be lost to the chaos if you don’t do something NOW! I made my first display board for my nephew, and I simply upholstered the back board of a picture frame with layers of Styrofoam packing packing paper and felt, just a simple push board. When we returned to Pittsburgh I made my kids a couple of matching ones with thrift store frames and some old black felt material I had in my craft room. I used quilt batting to make it fluff a bit. It wasn’t quite as sturdy for the pins as the Styrofoam had been, but it worked. As I lined the badges up to pin them I realized that the different kinds of pin backings were going to be a problem. Here is a picture of the two boards. Ranger eventually inherited them both because he and Lemon were running out of room.
One of the common ways to display them is on a banner, if you search you can find a number of fabulous internet pictures of great banners. You can also do a simple hanging![]() banner with block printed letters or if you aren’t crafty this one is available for sale on eparks. A simple canvas or muslin banner, hemmed, can be decorated in anyway you like. The upside of a banner is that you can iron/sew on the patches and it easy to put the badges on weather they have a push back or a pin back. I really liked this but knowing my kids they would take it down to play with it and that would be the end of it. Lemon really wanted to wear the badges all the time and had started pinning them to her purse. Unfortunately it causes the printing to rub off the badges pretty rapidly which was meltdown city, so we moved to wall displays.
banner with block printed letters or if you aren’t crafty this one is available for sale on eparks. A simple canvas or muslin banner, hemmed, can be decorated in anyway you like. The upside of a banner is that you can iron/sew on the patches and it easy to put the badges on weather they have a push back or a pin back. I really liked this but knowing my kids they would take it down to play with it and that would be the end of it. Lemon really wanted to wear the badges all the time and had started pinning them to her purse. Unfortunately it causes the printing to rub off the badges pretty rapidly which was meltdown city, so we moved to wall displays.
When I taught my Junior Ranger Class at our Homeschooling Co-op I had intended to make banners, but ended up with a pile of frames from someone moving, and found yards of felt in our fabric storage. To combat the pin dilemma I purchased wide ribbon which we strung across board to hold the push back badges. We used hot glue guns to affix the batting to the board and the felt to the edges of the board back, before pressing it back into the frame. It seemed to work really well and excited the children. But I have no word on how many of them actually used them.
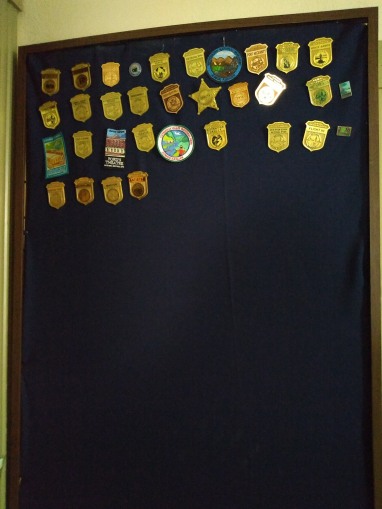
As my kids filled up their boards we needed a bigger board. Lemon has ceded all rights to organizing her badges to me, she likes to look at them and is content to let me deal with it. Because of this Ranger was given both original boards (pictured above) and Lemon got a large frame leftover from some room shifting. It was an ikea frame and there wasn’t a sturdy back to upholster, so instead I used a staple gun to stretch the fabric inside the frame, as if you were stretching canvas. This had all the benefits of a banner but maintained the permanence of a frame. I really like how it came out though I should have ironed the cloth first. I can even use safety pins to old the patches on which is definitely an upgrade. Plus tons of room to grow!